Before processing one of your photographs using this tutorial, you will first need to download and install a software program called Photomatix Pro version 3.03.
To create the multiple images required for the HDR process, I first capture the two images for my Vertorama using the camera's RAW mode, and then I create several differently exposed images from each RAW file. Although you can use your favorite program to convert your RAW images, I use the Image Data Converter SR that came as with my camera.
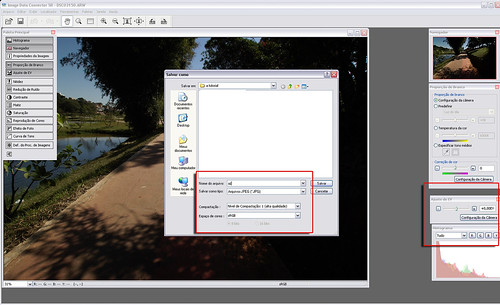
Step 1. Open your RAW file and in your RAW image converter software and save it in a folder without any changes, I usually draw this picture of "a" and “z", where "a" is the lower image of the Vertorama, and "z" the original EV"0" (ZERO).
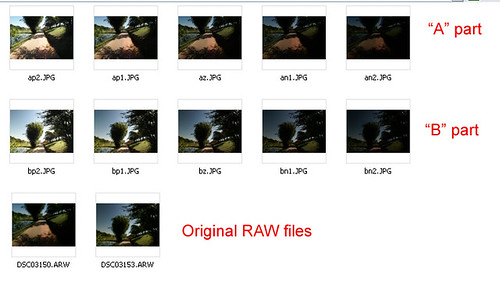
Step 2. Repeat this operation, but changing the EV for +1 what I call the p1 ("p” positive). Continue doing this for ap2.jpg

Step 3. Repeat Step 2, using negative values, ie. “an1.jpg” and “an2.jpg”.
Now repeat Steps 1 to 3 with the image that will be the top part of the of Vertorama.
After performing all the above steps, you should have the files as shown below.
Let's start the work. First we open Photomatix and click on the "Generate HDR image" (A) button. Then "Browse" and select only the files "to" (B), now in (C) you should put the EV factor used in our case "1", and click the “OK” button.
Although the following table (D) offers several options, as in this case we used only RAW images, which are is not necessary to align. I particularly liked the results which are achieved by selecting the "Attempt to reverse-engineer tone curve applied." Option. Click "OK" to continue.

After merging all the photos, the following image will appear. Now click the button marked "Tone Mapped".
When the image opens, it will be quite so pale, meaning that the setup is in its "Default” mode.
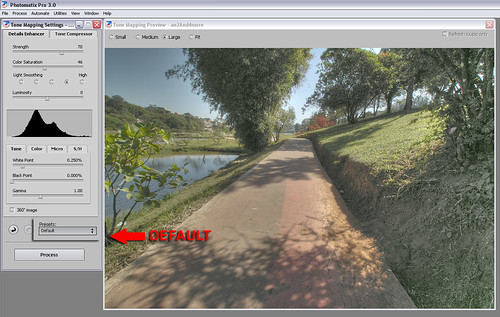
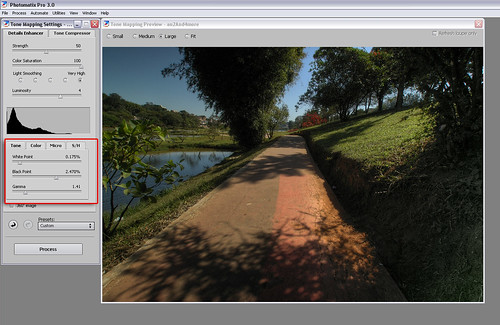
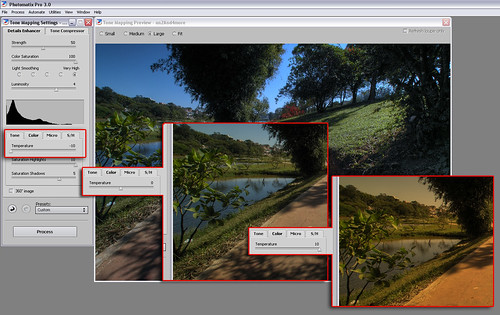
Now you must adjust the image to suit your own preferences. Using In the controls offered in the "Tone" tab, you should adjust the setting of the three factors to which the image is the closest to the original.
After changing the color temperature (as shown in next fig.), we have the three basic parameters (-10 = cold), (0 = normal), (+10 = hot), and is here where we will make our images "feel hot."
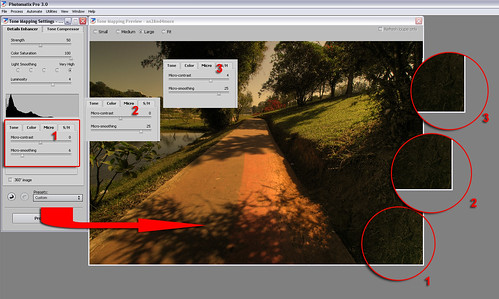
The next step is to make the adjustments of "micro" (Micro-contrast and Micro-smoothing). Steps 1, 2 and 3.
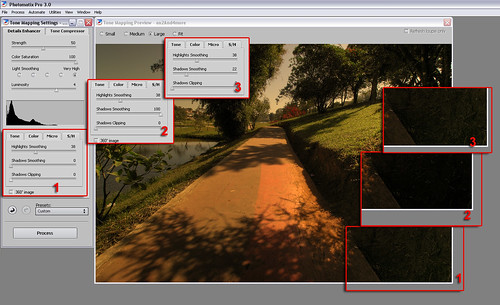
Now we select the "S/H" (Shadows and Highlights) tab, and choose the ideal settings for each phase. 1, 2 and 3.
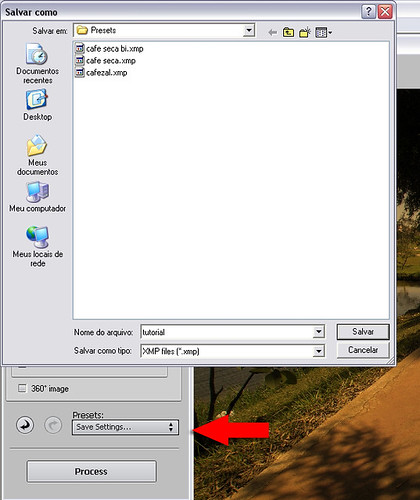
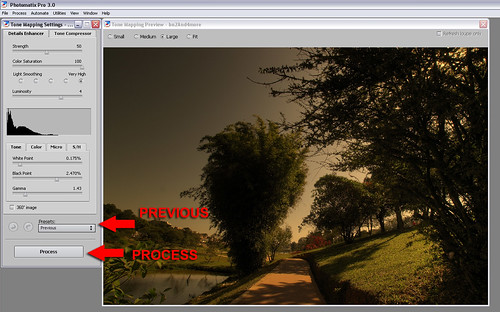
Once you have selected the best settings for your image, you should remember to save these settings. This will be very useful when you have a similar situation in the future.
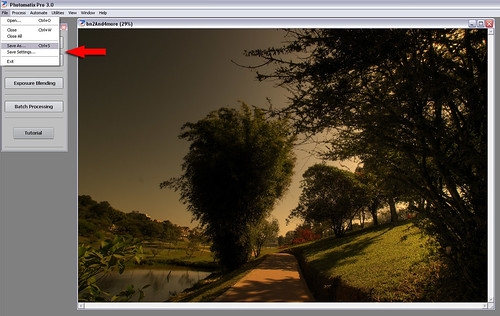
Next we click on the "Process" button to apply all your selections to the image. You should now save your image.
You should then repeat the process for the upper part "b" (above) of your Vertorama. But now there is an advantage, Photomatix automatically selects your "Previously used" settings, so all you'll need to do is simply click on "Process" and save the result.
I am including this link (here), which shows my settings used in this tutorial, in case you want to test them with your own photos.
After performing all the above steps, we simply unite the two photographs. If you do not know how to do this, you should follow the Vertorama tutorial created by Paul (Panorama Paul).
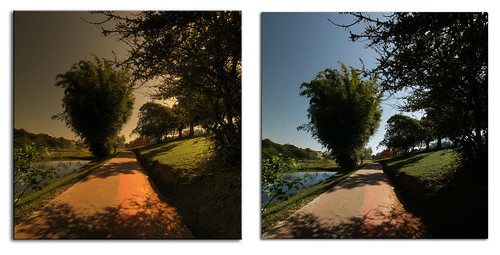
Below you can compare the difference with and without the “hot touch” treatment.


Aucun commentaire:
Enregistrer un commentaire